The Sport of weightlifting comprises of the Snatch and clean + jerk, the following write up will breakdown its phases, progressions to help improve these positions and how to tackle your snatch training!
Before we look at the sperate phases lets cover the grip, the snatch is one movement from the floor to overhead and the most optimum hand position to decrease the distance the bar must travel, increase the ability to lock the arms & shoulders overhead and finally get the bar into the hips without excessive bending is with a wide grip. Setting your grip is as simple as finding the position that the bar is inline with the hip pocket when the arms are straight and shoulders blades squeezed back.
Right, now the grip is sorted let’s talk about the phases.
Phase 1:
This phase is getting the barbell to the floor, to the middle of the thigh, As I will explain, the time we start to aim to increase speed and extension is when we pass the knee making this first phase controlled and is focused on ‘setting up for success’.
-Find your hand width and position, also insure you are using the hook grip (Thumb first, then wrap the fingers)
-Feet are going to be roughly shoulder width apart, this can be slightly different for everyone as we are all built slightly differently! Weight should be in the mid foot with the heels planted. Toes can be turned slightly out if it aids your torso position.
-Next, to start insuring the bar is in contact with the shins, from here aim to get the shoulder ABOVE the bar and think about pulling the shoulders back, creating a tense and flat back position, from here think about keeping the hips back, creating tensions in the glutes, hamstrings and quads.
-To get the bar moving think about pushing into the floor with the legs, slowly pushing the knees back to help keep the bar going in a straight line, during this aim to keep your hips and shoulders rising at the same rate to stop you bending too far over the bar
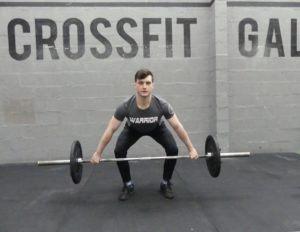
-At the mid-thigh the chest should be slightly over the bar, eyes and chest up with tension in the back and legs.
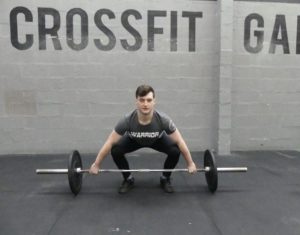
Snatch Start Position
Snatch First Phase
Snatch Mid Thigh Position
See our beginner athlete learning to snatch here
Phase 2:
Now, at the mid-thigh you are tense in the legs, the bar is still close to the body, but the hips are back and therefore this gives you the potential now to exert force from the lower body upwards through the bar. We want this phase to be the change of speed and increase of power on the bar.
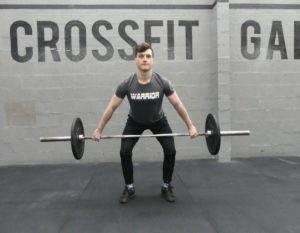
-From this point you need to think about increasing your speed and driving the body upwards like a jump, aim to drive your body towards the ceiling Whilst squeezing your glutes and pushing hard with the legs, the shoulders will be slightly behind the bar giving it room to stay close.
-As the hips extend the bar should contact the hips but this should NOT be a whack outward but more a brush upwards to insure the bar and force is as vertical as possible. Keep the back and shoulders set and think about the bar meeting the hips (Keep the hips) not chasing the bar with your hips.
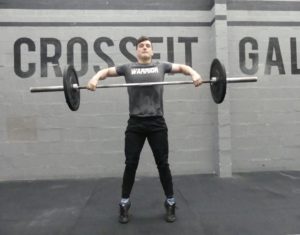
-Now the bar is travelling with maximal force through it, to keep the path close you need to drive the elbows high above the bar to guide the path close to the body, imagine you have paint in the middle and you want to paint up your t-shirt.
-The bar should finish around the sternum and no higher, if its super high you will be slow underneath and the bar may crash on you, we want to build speed to pass over into your heavy snatches so aim to mimic the same position it will be in when going heavy.
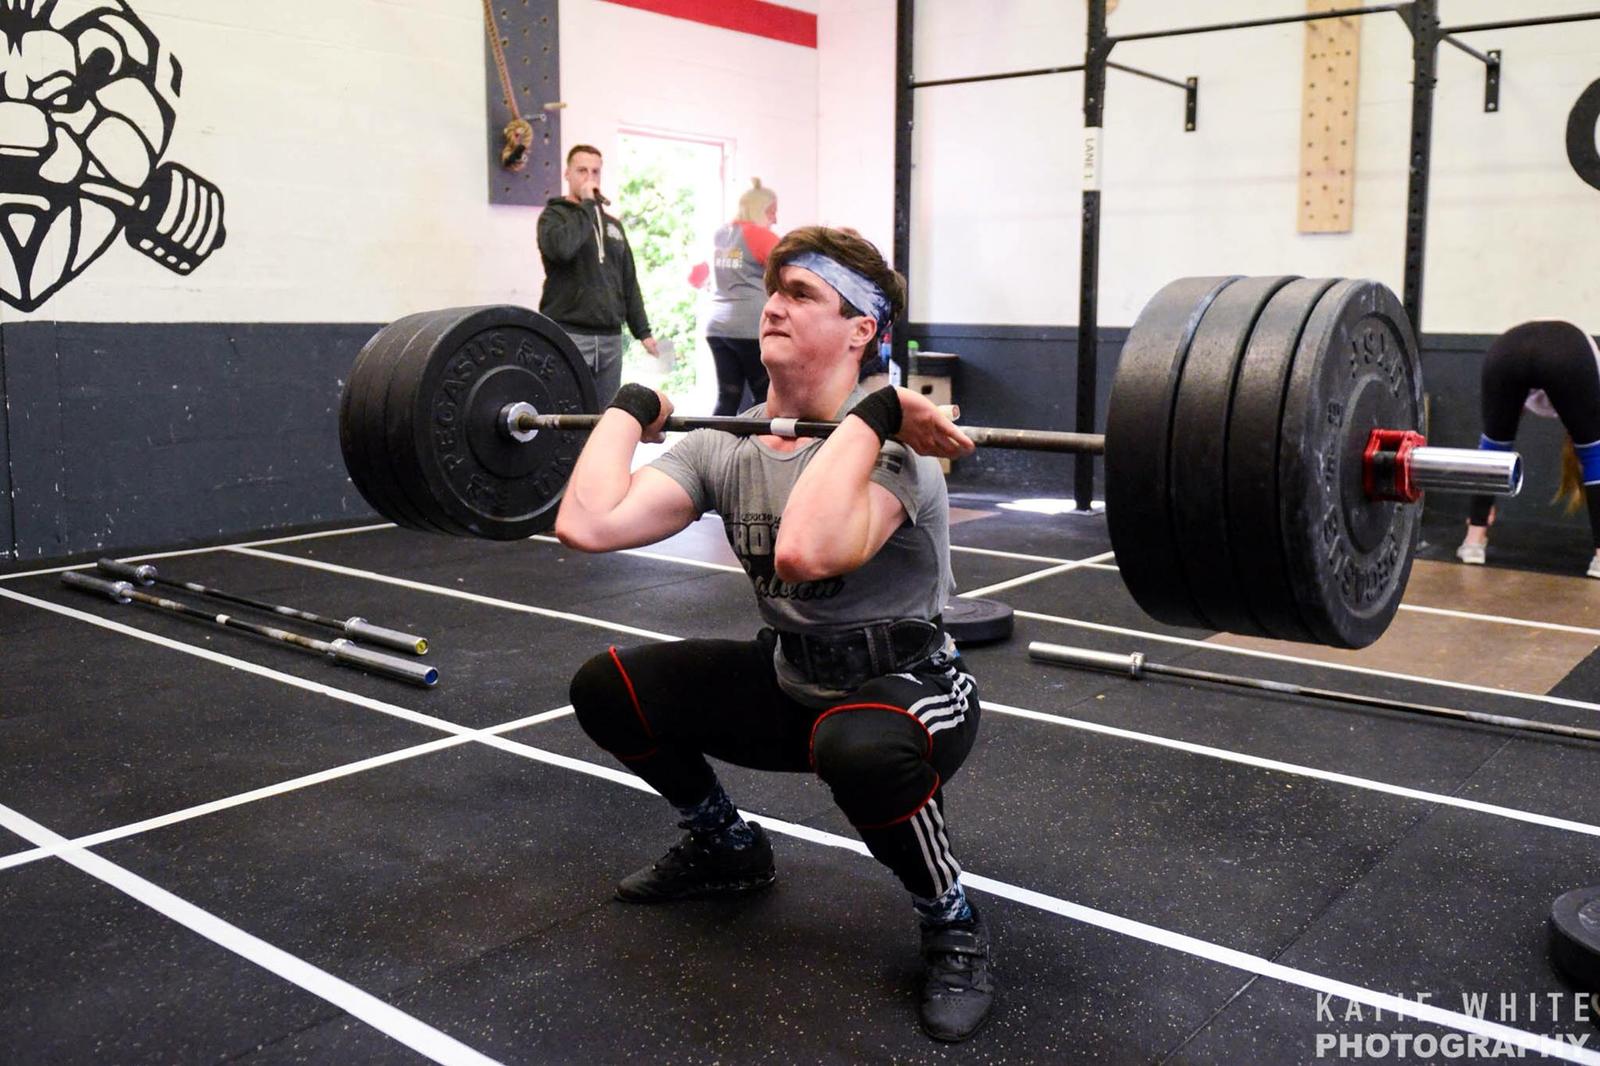
Snatch Mid Thigh Position
Snatch Extension Phase
See one of our experienced lifters lifting here
Phase 3:
Now we have driven tall and the bar has maximal force, we must enter the catch phase of the lift.
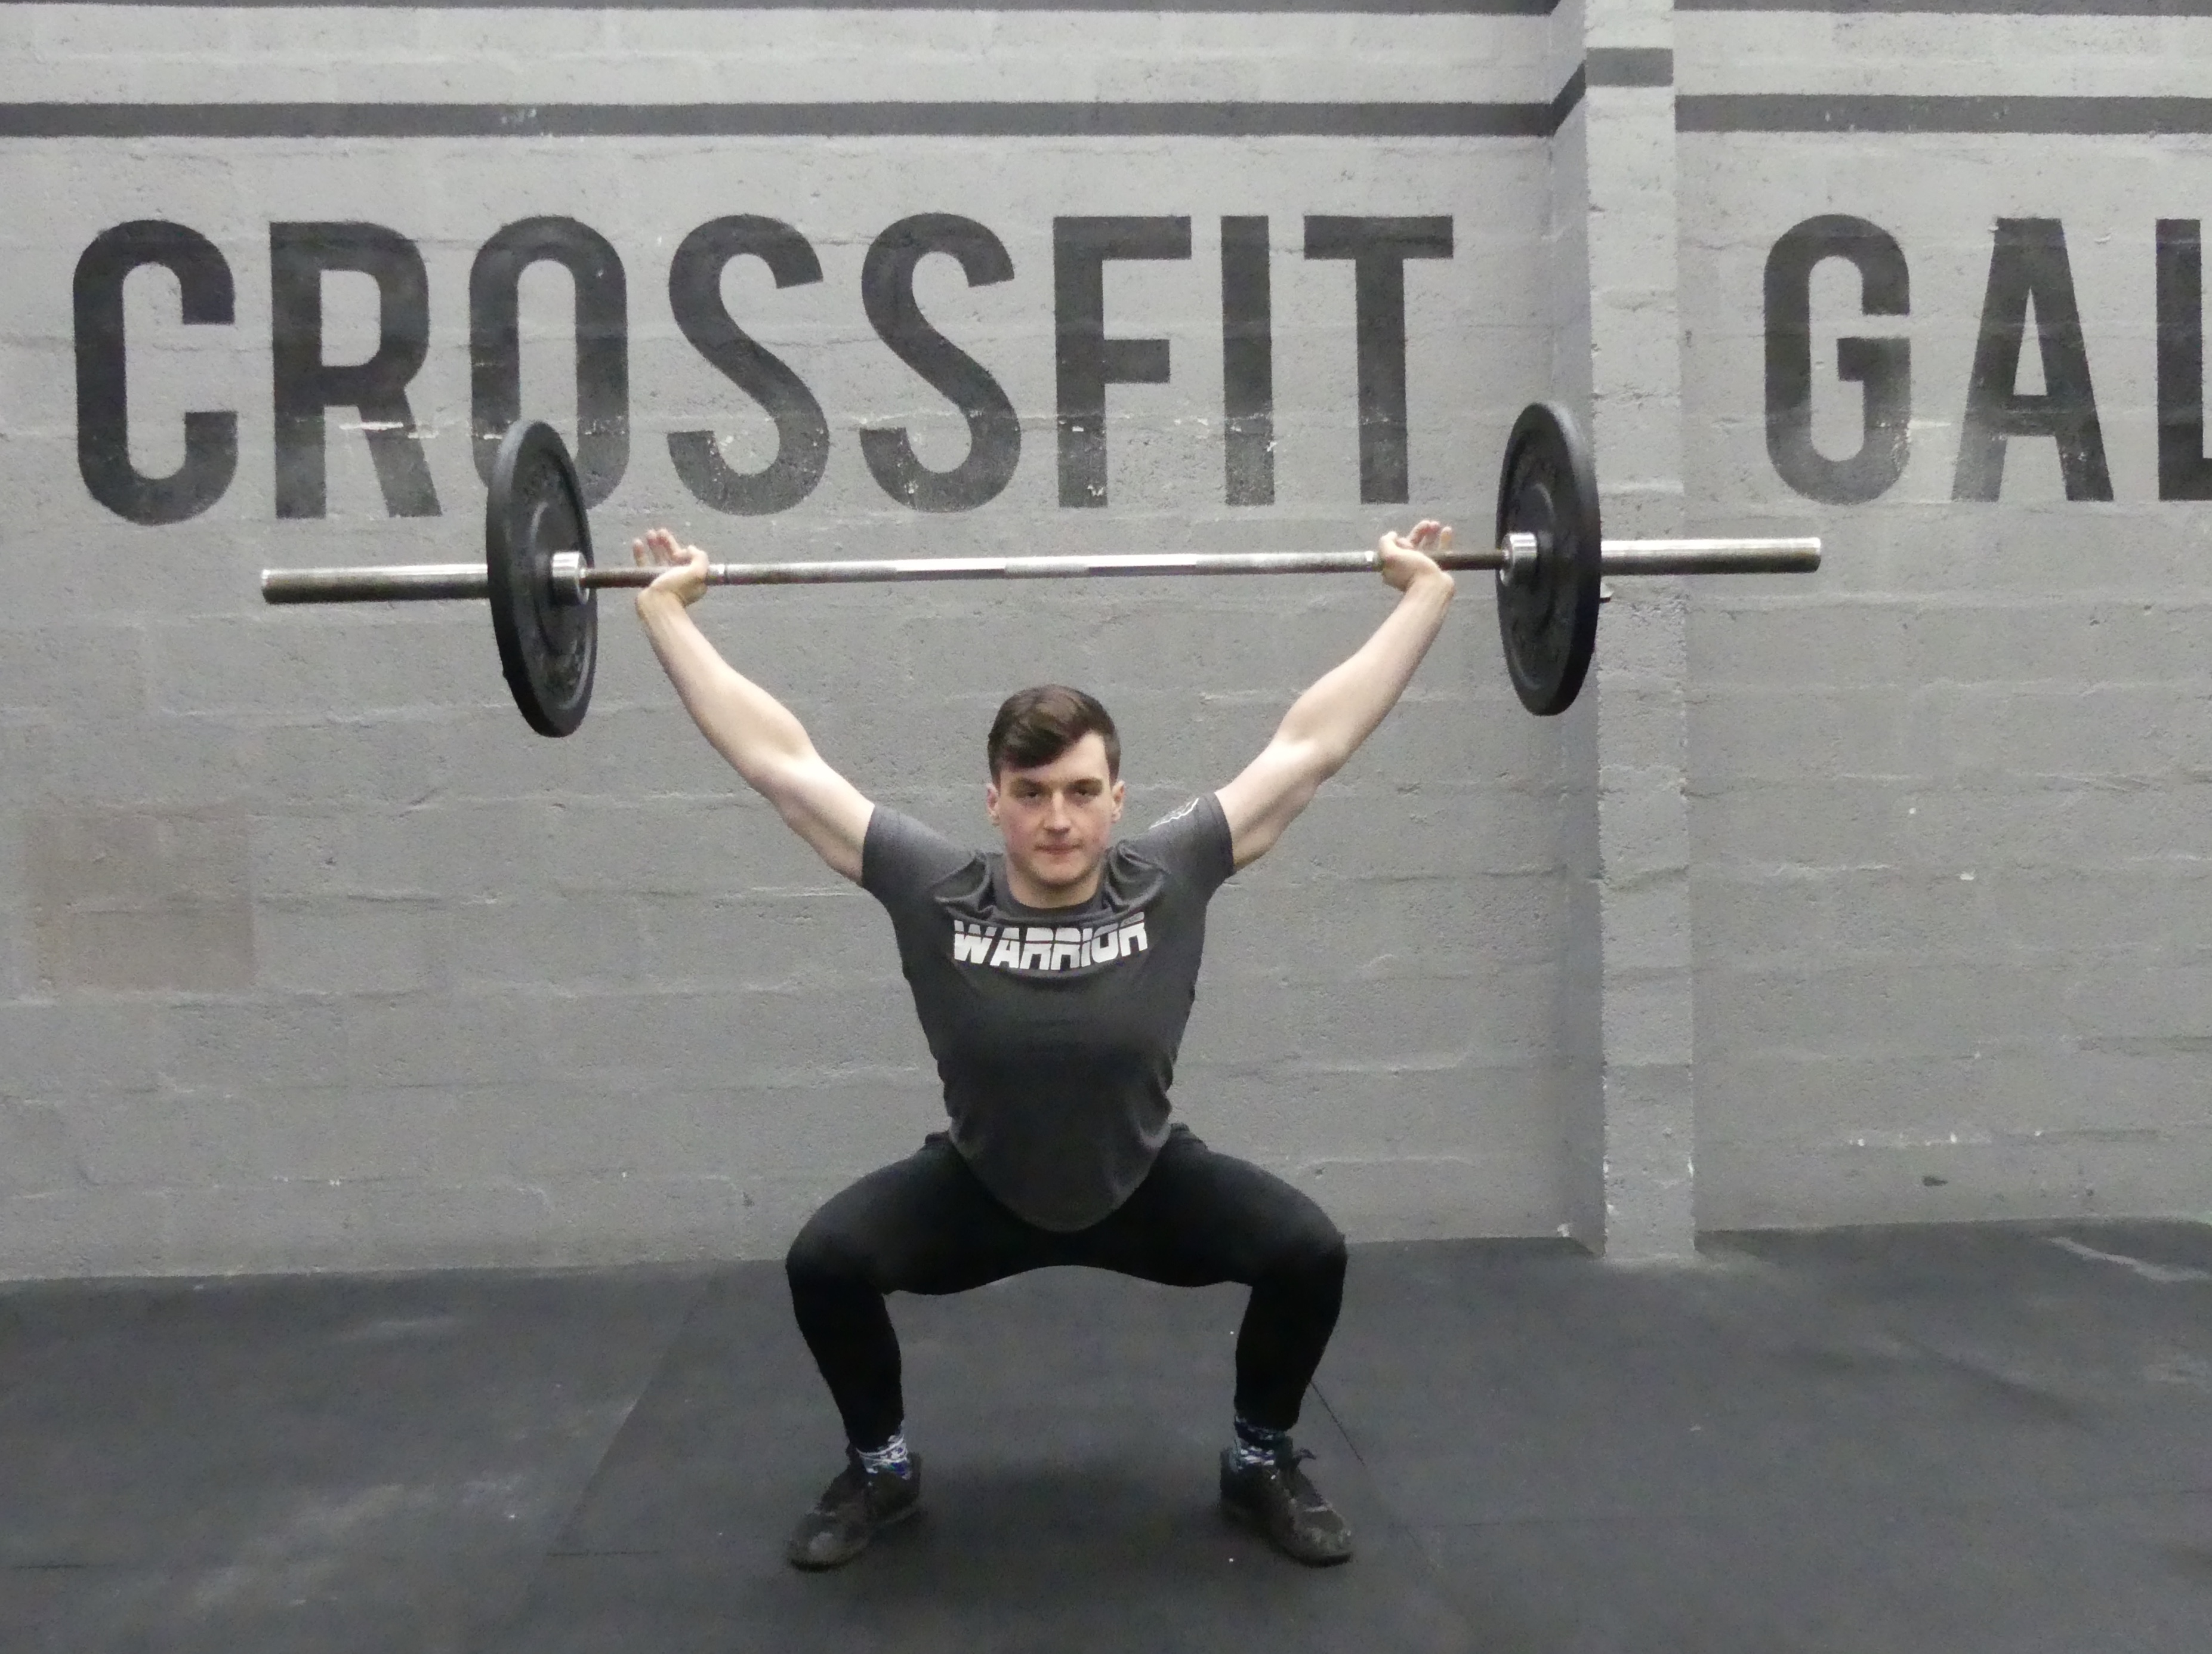
-To start, lets cover the Overhead Squat which is the bottom position we aim to catch the bar at.
-Feet are now outside the shoulders in your squat stance, in the bottom, the knees are driven out in line with the toes, the torso is upright, and the bar should be in line with the traps, if its too far back or forward the weight shifts away from your midline and you will become unstable. Finally push into the bar and drive the armpits up and out creating a nice locked out position through the arms/shoulders.
-Now we have covered what we look for in the catch, we need to get into that position with SPEED and CONFIDENCE.
-After executing the drive and extension, the bar is close and almost ‘weightless’ due to the force outputted
-At this point, you need to move the feet out to your squat position, whilst cueing to ‘shrug’ yourself underneath the bar, at this point you need to bring the elbows and arms underneath the bar and PUNCH up into it creating that strong & stable position we want in the overhead squat.
-Keep driving the knees out over the toes, keep the chest up and push up into the bar throughout.
-From here keep the bar stable and stand the lift until the hips are extended and you are stood tall with the bar locked out still overhead.
-As you stand aim to keep the torso up to avoid any movement and instability whilst standing the bar up.
Snatch Extension Phase
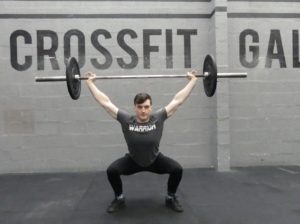
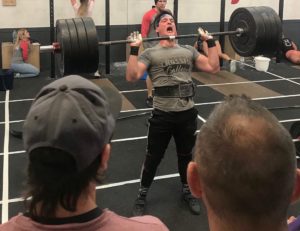
Snatch Catch Position
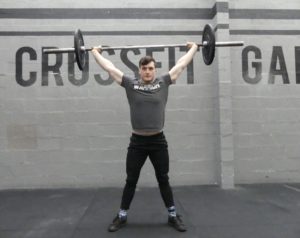
Snatch Finish Position
There you have the phases of the snatch! the aim is to combine these three stages into one fluid motion! you should always focus on, pushing with the legs, driving upwards, keeping the bar close and catching with speed & confidence!
-Beginners should focus at least 6-12 weeks with super light loads (Training bar – regular bar – +5-10kg), focus on perfect form and making the positions comfortable before thinking about adding any load to the movement. Getting an experienced coach to monitor you will be most beneficial accelerating development.
-Experienced and intermediate lifters should still never focus on heavy weights all the time, although you are comfortable with the lift, making beneficial progress will be best achieved with consistency, focus on quality between 60-90% in the snatch itself and its variations (Power snatch, Hang snatches & complexes of multiple variations). We want to train one pattern and create good habits for 1RM attempts when they come around.
Finally, for those who want to focus on certain positions and areas that are weak the following are some examples of movements that will help pass over to the full lift.
Overhead and Catch Position:
Tempo Overhead squats keep this super light and control the positions. A good start is 3-5 sets of 5 reps, however complete with the following tempo: 5s down, 5s pause, 5s up, 5s at the top, this is a lot of tension and time so keep it at the empty barbell, this is a great way to teach patterns and develop your positions.
1St – 2nd Phase:
Snatch Grip Deadlifts and Snatch Pulls:
These can be used for both technical focus or a great variation for increasing strength off the floor with heavier loads, for technical development aim to get 5kg discs on or training plates to make sure you are setting up from the floor the same as a regular snatch. from there like the overhead squats focus more of controlled tempos and higher reps (e.g 3 sets of 5 in the warm up) with the aim being feeling and understanding how the movement should feel, film lifts or have a coach watching to give feedback. For heavier loads, you are looking at reps of 1-5 per set and the percentage could range from 80-110%+ for both deadlifts and pulls; this gives overload to the 1-2nd phase in comparison to the main lift increasing strength off the floor whilst also developing the drive and extension of the hips/legs.
2-3rd Phase.
Hang snatch from the mid-thigh & the hi-Hang (Hip pocket)
This phase can be difficult for those who tend to rush off the floor almost ‘yanking’ the bar and using this momentum to carry through the rest of the phases.
Hang snatch from the mid-thigh & the hi-Hang (Hip pocket) are great variations to remove that momentum and teach you to effectively exert force from just above the knee which is going to aid your consistency when full snatching, Sets can vary from 1-3 reps and sets are also dependant on the percentage range, an example session may be as follow: 9 sets Every 90s of 1 Hi-Hang + 1 Hang (Mid-thigh) snatch @65-80% of your 1RM. You could also go 2-3 sets of 5 on each variation within your snatch warm up.
The Catch:
Overhead Squat & Snatch Balance Variations
The overhead squat is a great starting point to improve the mobility and position itself, however when snatching we need this position with SPEED! So, the next step is the snatch balance.
The light variation is without a dip, the bar starts on the back and from here, punch yourself down moving the feet out to your squat, punch with the arms and keep the torso up! Again, these can be slotted into your snatch warm ups for sets of 5 to prime that confidence and speed.
The second variation is with an added dip and drive, however the focus should still be catching the bar within the bottom position with speed, but now the load will increase shifting the focus to developing strength and stability in the bottom position, for this heavy variation keep the reps from 1-3 varying from around 60-100% of your 1RM as a guide, when confidence is built possible reps at slightly above 100% is a good indicator of a stable and strong catch position however remember these variations are tools! You are better off dialling in consistency with the catch and movement than shifting as much weight as possible.
To conclude here is a little example of a snatch session you might get from one of our coaches if you were focused on weightlifting.
Empty Barbell warm up:
- 2x 5 Snatch Deadlifts
- 2×5 Snatch pulls
- 2×5 Overhead squats (3s down, 2s pause, fast up)
- 2×5 Snatch balance (no Dip)
- 2x 3 Hi hang snatch
- 2x 3 Hang Snatch
- 2x 3 Full snatch
Main Lifts:
A: 12 sets Going every 2minutes
1 Hang Snatch + 1 Snatch + 1 Overhead Squat @65-85%
Focus on dialling in effective speed and positions in the hang to carry over to the full snatch, keep the feet in the same position for the overhead squat as the full snatches to aid consistency of the feet throughout all movements.
See one of our lifters performing a complex here
B: 5 sets of 3 snatch balance @70% of your 1RM
Pause in the bottom for 2s on each.
Focus is catching in the bottom position with speed and control, the added pauses are improving stability in the bottom position.
OR if the weakness and focus is 1-2nd Phase:
B: 5 sets of 3 Snatch Pulls on a deficit @80-100% of 1RM snatch
The deficit will mean the plates won’t touch the floor throughout the 3 reps further increasing the importance of the body position explained in phase 1-2, keeping the hips and shoulder rising together and PUSHING with the legs.
ENJOY Mastering that snatch!! `
If you enjoyed this blog post, check out our post on Structure for Strength Training
If you want to work with our of our coaches one to one to improve your technique, book in for a personal training session.


Recent Comments